Copper jewelry is a playground for the creative soul. With its warm hues and versatile properties, copper has enchanted DIY enthusiasts, crafters, and jewelry makers alike. Whether you're a beginner looking to dabble in the world of handmade accessories or a seasoned artisan seeking new inspirations, copper offers endless possibilities to bring your designs to life.
Unlocking your creativity with hands-on techniques can be incredibly rewarding. Not only does it allow you to produce unique pieces that reflect your personal style, but it also provides an opportunity for skillful self-expression. As you bend, shape, and mold this pliable metal, you'll discover the joy of transforming raw materials into stunning wearable art. So, grab your tools; it’s time to dive deep into the fascinating world of copper jewelry making.
Understanding Copper: A Jeweler's Best Friend
Copper, with its striking reddish-brown hue, is truly a jeweler's best friend. Its malleability and ductility make it incredibly easy to work with, allowing even beginners to create intricate designs without breaking a sweat. Unlike harder metals like stainless steel or titanium that can be challenging to manipulate, copper can be easily bent, twisted, and hammered into shape using simple tools. This means you can let your creativity run wild, exploring a myriad of design possibilities from delicate filigree earrings to bold statement necklaces.
One of the standout properties of copper is its excellent conductivity of heat and electricity. This characteristic is particularly beneficial during the soldering process—a fundamental technique in jewelry making where pieces are joined together by melting a filler metal. Since copper heats evenly and quickly, it ensures that your joints are strong and seamless, which is crucial for both the durability and aesthetic appeal of your creations.
Moreover, copper has an unmatched ability to develop a patina over time, giving each piece a unique character that's impossible to replicate with other metals. Patinas form as a result of oxidation when copper reacts with air or moisture. Rather than being viewed as tarnish or wear, these beautiful color changes—from rich browns to vibrant greens—can enhance the vintage appeal of your jewelry pieces. You can even experiment with different chemical treatments to achieve specific patina effects intentionally.
Adding another layer of versatility to this remarkable metal is its affordability compared to precious metals like gold or platinum. This makes copper an economical choice for hobbyists and professional jewelers alike who want to practice new techniques without investing heavily in materials. Plus, because it's widely available at craft stores and online suppliers, you won't have any trouble sourcing what you need for your next creative venture.
Essential Tools for Copper Jewelry Making
Before you dive into creating stunning copper jewelry, it's crucial to have the right tools at your disposal. For beginners, essential tools include pliers (round-nose, flat-nose, and chain-nose), wire cutters, a jeweler's saw, a bench block, and a chasing hammer. These basic tools will allow you to shape, cut, and form your copper pieces without much hassle. If you're just starting out, consider purchasing a beginner's toolkit that often includes these items in one convenient package.
As you gain more experience and wish to take on more complex projects, you might want to expand your toolkit to include additional specialized items. For instance, a rotary tool with various attachments can help you achieve detailed work like engraving or polishing intricate designs. Torch kits are key if you're keen on learning soldering techniques. Investing in high-quality files and sandpapers is also vital for finishing touches that give your pieces a professional look.
When it comes to sourcing quality tools, there are several options available both online and offline. Craft stores such as Michael's or Joann Fabric and Craft Stores offer reasonably priced beginner kits and occasional discounts. Online retailers like Amazon provide vast selections along with customer reviews that can guide your purchase decisions. Additionally, specialized jewelry-making suppliers such as Rio Grande or Otto Frei offer premium-grade tools for when you're ready to upgrade.
Whether you're fresh on the scene or an experienced artisan expanding your toolkit, investing in high-quality tools is pivotal in enhancing both the process and outcome of your creations. The right equipment not only makes crafting easier but also opens up new possibilities for creativity that simpler tools may not afford. With these essentials at hand, you'll be well-equipped to unlock the full potential of your artistry in copper jewelry making.
Technique #1: Bending and Shaping Copper
Bending and shaping copper wire is one of the most fundamental techniques in jewelry making, providing a solid foundation for creating a variety of unique designs. To get started, you'll need to select your desired gauge of copper wire—a thicker gauge will yield sturdier pieces while thinner gauges offer more flexibility for intricate patterns. Begin by cutting an appropriate length of wire using flush-cutters. Secure the wire in your flat-nose pliers and start bending it according to your design plan. Whether you're aiming for simple loops or elaborate swirls, consistency in applying pressure is key.

Here's a step-by-step guide to crafting basic shapes: First, draw out your design on graph paper, then use this as a template. Place the copper wire over the drawing and methodically bend it into shape using round-nose pliers for curves and flat-nose pliers for angular bends. Wrap the ends to secure any open loops neatly—this not only improves the aesthetic but also ensures longevity. One helpful tip is to practice bent designs with inexpensive aluminum or brass wire before moving on to copper; this helps avoid wastage.
Achieving precise shapes can sometimes be challenging; patience truly pays off here. Make small adjustments rather than trying to force large changes at once—this prevents kinking or weakening the wire. For symmetrical designs like heart motifs or geometrical shapes, consider using mandrels or dowels as guides to maintain uniformity in your bends. Additionally, when creating multiple identical components such as earring sets or necklace links, measuring tools and jigs can significantly enhance precision and repeatability.
Remember, every piece you create hones your skill further; even imperfect attempts contribute to learning mastery over time. Dive into projects like twisting two wires together for layered textures or embedding beads within bends for added flair. The flexibility of copper makes it ideal for experimentation—so don't hesitate to let your creative juices flow! Sharing your journey with fellow artisans online can provide invaluable feedback and inspiration as you continue perfecting this craft.
Technique #2: Soldering Basics
Soldering is a fundamental technique in jewelry making that allows you to combine metal pieces seamlessly and securely. By using a filler metal, known as solder, which has a lower melting point than the copper you're working with, you can create strong joints without altering the structure of your primary material. Whether you're attaching clasps, joining seams, or adding decorative elements to your pieces, mastering soldering will significantly enhance your ability to bring intricate designs to life.
When embarking on your soldering journey, it's essential to start with the basics. Begin by gathering key tools such as a soldering torch, flux (a chemical cleaning agent), solder wire, heat-resistant surface or soldering block, and proper ventilation equipment. Prepare your copper piece by cleaning it thoroughly; any dirt or oil can prevent the solder from adhering properly. Apply flux to the areas you plan to join—this helps prevent oxidation and enables smooth flow of the molten solder. Then, position your pieces on the soldering block and use tweezers or clamps to hold them steady.
Safety is paramount when using a torch. Always work in a well-ventilated area and wear safety glasses and gloves to protect yourself from harmful fumes and hot surfaces. Light your torch according to manufacturer instructions and carefully heat the joint area until it reaches the appropriate temperature for fusing—typically indicated by a subtle change in color of the copper just before it glows red-hot. Introduce the solder wire at this point; it should melt instantly upon contact with the heated copper. Allow it to flow into the joint naturally, then remove heat immediately once enough solder fills the gap.
Once you've successfully applied your solder, let everything cool down gradually before handling it further—direct quenching might stress or crack thin sections of metal. If necessary, finish off by cleaning off any remaining flux residue with water or an appropriate solvent suitable for jewelry-making purposes. Patience and practice are key: each project will sharpen your technique and broaden your creative horizons in copper jewelry making!
Technique #3: Crafting with Molds
Molds can be a game-changer when it comes to copper jewelry making, allowing you to create intricate designs with ease. There are various types of molds used in the production of copper jewelry, ranging from graphite molds and plaster molds to metal casts. Plaster molds offer a more rigid option that’s ideal for detailed work, while metal casts provide durability and can be reused multiple times, making them an excellent investment for seasoned jewelry makers.

Creating intricate designs using molds starts with selecting the right mold material based on your project needs. For example, if you're aiming for delicate earrings featuring floral motifs, a high-quality graphite mold would capture every petal detail perfectly. After choosing the appropriate mold, thoroughly clean and prepare your copper sheet or wire. One effective method is to pour molten copper into pre-heated graphite molds; this ensures that the metal flows smoothly into all crevices, capturing even the tiniest details.
For DIY enthusiasts keen on exploring new horizons in craftsmanship, experimenting with textures within the molding process can yield stunning results. Before casting your molten copper, try embedding natural materials like lace or leaves within the mold – these items will burn away during heating but imprint their unique textures onto your finished piece. Alternatively, layering different colors of powdered glass enamel inside the mold before adding the heated copper creates striking color variations upon cooling.
Utilizing molds opens up endless creative possibilities in crafting fine copper jewelry. From designing intricate pendants adorned with lace-like details to forging ornate bracelets featuring leaf imprints – each piece tells its own story through texture and form. By mastering the art of molding in copper jewelry making, you invite versatility and finesse into your repertoire while spurring boundless opportunities for artistic expression.
Technique #4: Creating Copper Rings
Creating copper rings is a rewarding and engaging process that allows jewelry makers to let their imagination run wild. To start, you'll need some copper wire or sheet metal, depending on your preferred design. Cut the metal to your desired length, taking into account the circumference of the ring finger. Using a mandrel—a tapered rod specifically designed for sizing rings—wrap the copper around it to form the base shape of your ring. For more precise work, you can use specialized ring pliers to help create smooth curves and bends.
Once you've established the fundamental shape, it's time to refine and personalize your ring. Sand down any rough edges using fine-grit sandpaper, ensuring a comfortable fit for the wearer. You might choose to hammer-texture the surface of your copper ring for an artisanal look—just be sure to place your piece on a sturdy anvil and lightly tap it with a ball-peen hammer in even strokes. Another way to add flair is by incorporating other elements such as gemstones or beads; simply solder these onto your ring using basic soldering techniques discussed earlier.
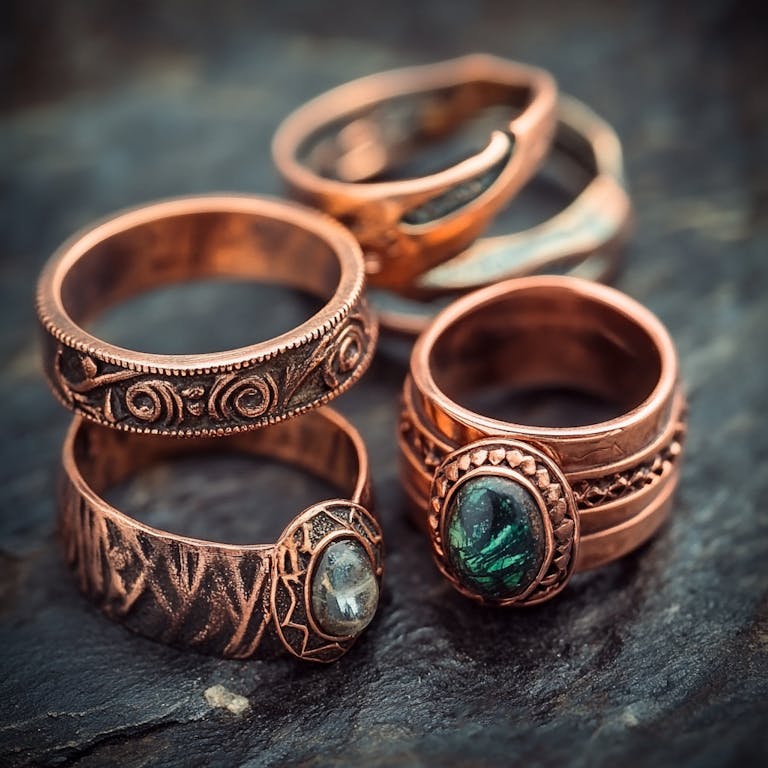
To make each piece truly unique, consider engraving initials or intricate patterns into the band using an engraving tool or etching solution. Alternatively, if you're drawn to organic designs, try experimenting with wire wrapping techniques where thin copper wires are coiled around stones set within the band itself. Each tiny twist and turn will add character and individuality to every creation. Remember, personalization doesn’t always mean complexity; sometimes, simple yet thoughtful alterations can transform a plain copper ring into an extraordinary keepsake with sentimental value.
Finally, don’t forget about patina finishes! Applying various chemical solutions can give your finished rings an aged or colorful appearance that sets them apart from standard designs. Liver of sulfur is a popular choice among artisans for achieving darkened tones that accentuate detailed engravings or texture patterns beautifully. By applying these methods thoughtfully, you can craft stunning copper rings that not only showcase skill but also resonate personally with those who wear them.
Technique #5: Designing Bracelets with Style
Copper bracelets offer an excellent canvas for expressing your creativity, thanks to the metal's versatility and beautiful finish. From sleek and minimalist cuffs to ornate bangles adorned with intricate patterns, there are endless bracelet styles you can create using copper. For example, hammered copper bracelets provide a rustic charm that highlights the warm tones of the metal, while twisted wire designs can add a modern, geometric touch to any outfit.
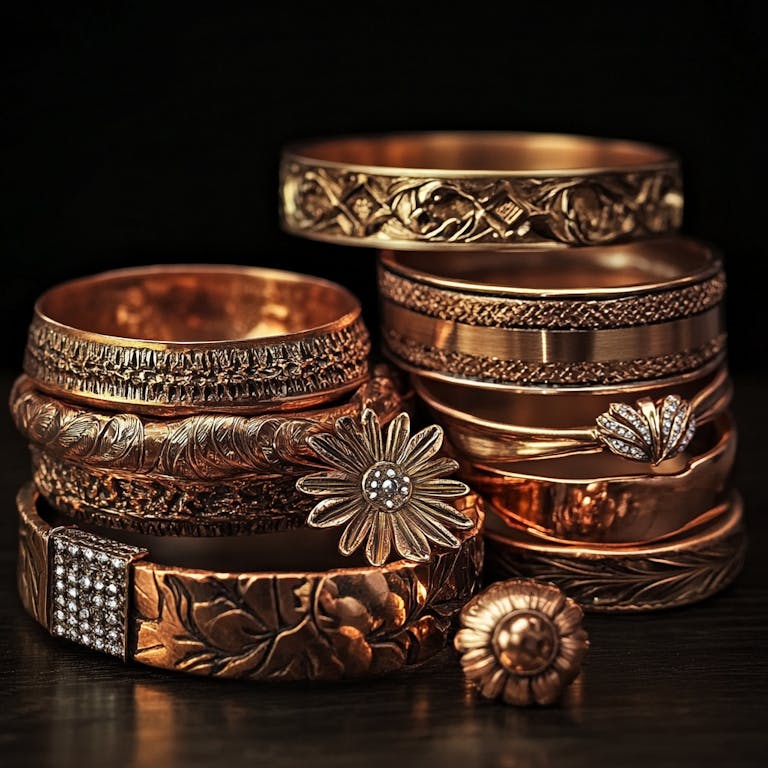
To ensure your bracelets stand out, consider combining different elements into cohesive designs. Start by experimenting with various textures and finishes: mix smooth sections with hammered textures or add a polished edge to contrast with a patina finish. Incorporating gemstones, beads, or enamel accents can also infuse color and depth into your pieces. Just remember to balance these different components well, so they complement rather than overshadow each other.
When designing intricate copper bracelets, it's essential to plan your layout first. Sketch out your ideas on paper before getting started to visualize how different elements will come together. Utilize techniques like wire wrapping or weaving to incorporate additional details in your design seamlessly. Pay attention to the gauge of wire or sheets you're using; thicker materials might require more force but will hold their shape better for sturdy cuffs and bangles.
For those looking for unique statement pieces, don't hesitate to experiment with asymmetry or mixed media approaches. Adding leather straps or fabric threads intertwined with copper links can produce stunning boho-chic designs that reflect both style and craftsmanship. Ultimately, embrace the freedom that comes with creating custom copper bracelets—each piece becomes a wearable work of art that showcases not just skill but personal flair as well.
Exploring Patinas: Adding Character to Your Copper Jewelry
Adding a patina to your copper jewelry is like giving it a unique signature. A patina is an intentional tarnish that forms on the surface of metal, providing a weathered, antique look that enhances the character and aesthetic appeal of your pieces. The process can reveal vibrant greens, blues, browns, and even reds—each adding depth and uniqueness to your creations. Applying a patina allows you to transform ordinary copper into extraordinary works of art without needing extensive tools or materials.
To achieve these stunning effects safely and effectively, several methods are available for DIY enthusiasts and seasoned artisans alike. One popular method is the use of liver of sulfur, which creates a range of colors from almost black to iridescent blues and greens. Other natural methods involve applying substances typically found in households - such as vinegar and salt - that result in different textures and hues when reacting with the copper over time. Whether you choose chemical or natural solutions, it's essential to work in a well-ventilated area and wear protective gear like gloves and safety goggles.
Applying these finishes isn't just about aesthetics; it's also an invitation to experiment creatively. For instance, try brushing on different layers of patina solutions to create gradient effects or masking off parts of your piece before applying the finish for intriguing contrasts between polished copper and aged patterns. Moreover, sealing your finished piece with beeswax or specialized metal sealants ensures that the colorful artistry remains preserved over time while accentuating its intricate detail. Exploring patinas opens up an array of possibilities, allowing you to infuse personal flair into each handcrafted jewelry item.
Embrace Your Creativity in Copper Jewelry Making
Now that you've mastered these seven essential copper jewelry techniques, it's time to put your own spin on them. Don't be afraid to experiment with new shapes, styles, and finishes. Each piece of copper jewelry you create is a reflection of your personal creativity and skill. Remember, the more you practice and explore, the more unique and captivating your designs will become.
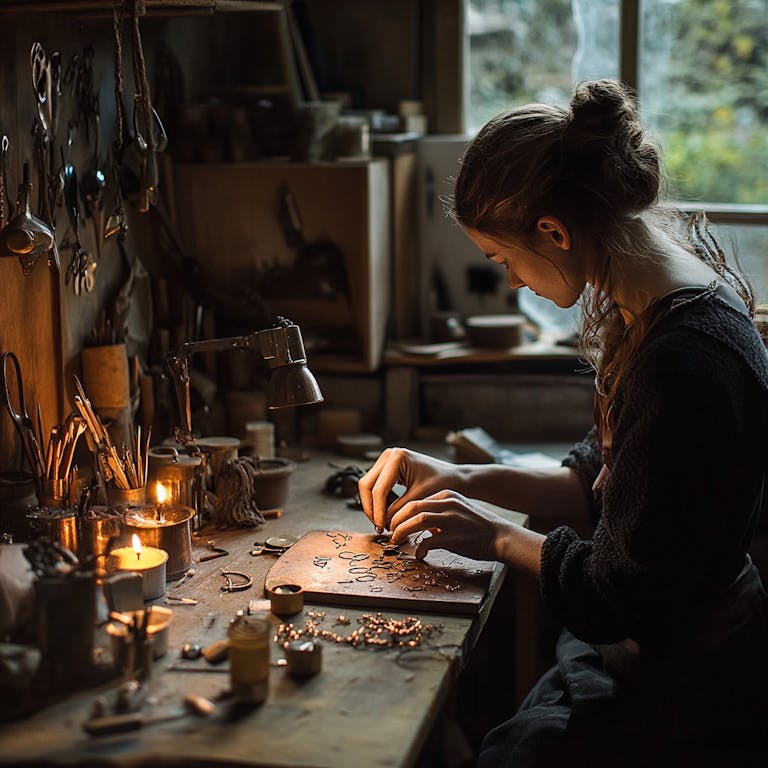
We invite you to share your creations with the DIY community. Show off your work on social media or at local craft fairs. Engage with other crafters for feedback and inspiration. This collaborative spirit not only enriches your artistic journey but also fosters a supportive environment where creativity thrives. So grab your tools, unleash your imagination, and start creating something truly exceptional!
